So - you might've read something about overclocking recently.
Essentially what this means is you can get roughly 50% extra performance out of your Pi! It'll allow you to overclock the CPU to up to 1Ghz and while the Pi is cool enough it'll run at this level. If it overheats? Well, they've added a fail safe into the latest Rasbian - it'll fall back to a lower config:
And best of all, it's 100% endorsed by the foundation - you can do this without invalidating your warranty! So - try out the latest distro - you can find it here.
Enjoy!

Thursday, 20 September 2012
Monday, 20 August 2012
Start VNC automatically
So a couple of you have been asking about getting VNC to start automatically (me included). I did a bit of digging and have figured out what to do - it's a few simple steps. First off though, must say thanks to Penguin Tutor for the actual answer to this issue.
So - I'm assuming that you have VNC up and running, working if you start it manually after each boot. If not, take a look here.
Create startup file
The first thing you need to do is create the file that will actually start VNC on startup. I'm doing this via Putty (instructions here), but you can just as easily use Terminal directly from the Pi.
Type the following:
sudo nano /etc/init.d/tightvncserver
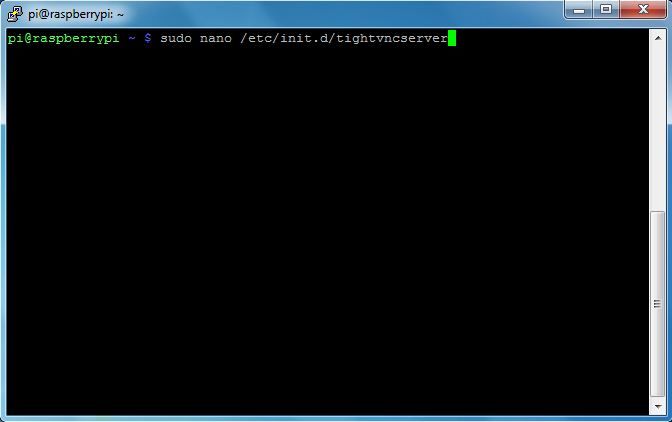
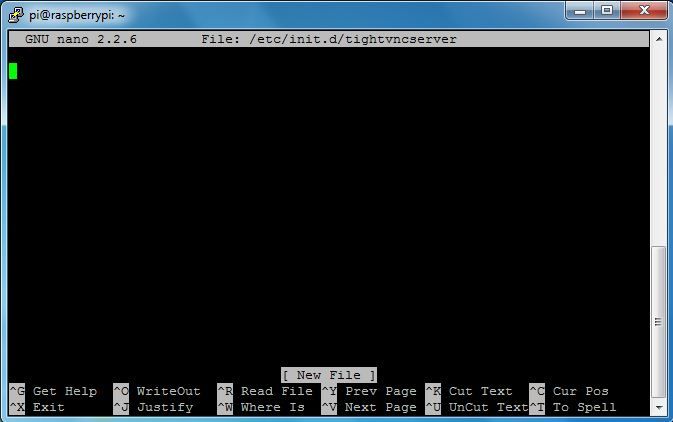
NOTE: nano is a lightweight editor - the command above will create a new file called tightvncserver in the /etc/init.d directory and open it for editing, presenting the following screen (note the [ New File ] entry at the bottom, indicating a new file):
Once you have the file open, paste in the following:
# First configure the user you want to run this under - this will generally be pi, unless you've created your own users
export USER='pi'
eval cd ~$USER
# Check the state of the command - this'll either be start or stop
case "$1" in
start)
# if it's start, then start vncserver using the details below
su $USER -c '/usr/bin/vncserver :1 -geometry 1280x800 -depth 16 -pixelformat rgb565'
echo "Starting vncserver for $USER "
;;
stop)
# if it's stop, then just kill the process
pkill Xtightvnc
echo "vncserver stopped"
;;
*)
echo "Usage: /etc/init.d/vncserver {start|stop}"
exit 1
;;
esac
exit 0
# thanks - check out http://myraspberrypiexperience.blogspot.co.uk for more info!
NOTE: In the file I've specified my own resolution with the text -geometry 1280x800 - you can leave this out of you want
This will be what your screen now looks like.

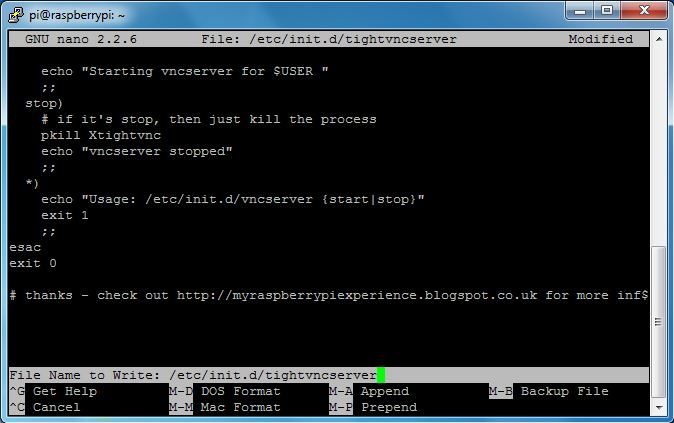
To exit, press Ctrl+X. You'll be prompted to save - just type Y:

You'll be prompted to confirm the filename - just press Enter:
Set file properties
Once that's done make sure the file has the right propertied by typing the following:
sudo chmod 755 /etc/init.d/tightvncserver
NOTE: Important to do this step every time you modify this file. I redid these steps to create the tutorial, skipped this step and couldn't VNC in on the reboot!
Add File to startup sequence
And now just add your file to the list of startup actions by typing the following:
sudo update-rc.d tightvncserver defaults
And that should be it! Just restart, and you should be able to VNC straight in!
So - I'm assuming that you have VNC up and running, working if you start it manually after each boot. If not, take a look here.
Create startup file
The first thing you need to do is create the file that will actually start VNC on startup. I'm doing this via Putty (instructions here), but you can just as easily use Terminal directly from the Pi.
Type the following:
sudo nano /etc/init.d/tightvncserver
NOTE: nano is a lightweight editor - the command above will create a new file called tightvncserver in the /etc/init.d directory and open it for editing, presenting the following screen (note the [ New File ] entry at the bottom, indicating a new file):
Once you have the file open, paste in the following:
# First configure the user you want to run this under - this will generally be pi, unless you've created your own users
export USER='pi'
eval cd ~$USER
# Check the state of the command - this'll either be start or stop
case "$1" in
start)
# if it's start, then start vncserver using the details below
su $USER -c '/usr/bin/vncserver :1 -geometry 1280x800 -depth 16 -pixelformat rgb565'
echo "Starting vncserver for $USER "
;;
stop)
# if it's stop, then just kill the process
pkill Xtightvnc
echo "vncserver stopped"
;;
*)
echo "Usage: /etc/init.d/vncserver {start|stop}"
exit 1
;;
esac
exit 0
# thanks - check out http://myraspberrypiexperience.blogspot.co.uk for more info!
NOTE: In the file I've specified my own resolution with the text -geometry 1280x800 - you can leave this out of you want
This will be what your screen now looks like.
To exit, press Ctrl+X. You'll be prompted to save - just type Y:
You'll be prompted to confirm the filename - just press Enter:
Once that's done make sure the file has the right propertied by typing the following:
sudo chmod 755 /etc/init.d/tightvncserver
NOTE: Important to do this step every time you modify this file. I redid these steps to create the tutorial, skipped this step and couldn't VNC in on the reboot!
Add File to startup sequence
And now just add your file to the list of startup actions by typing the following:
sudo update-rc.d tightvncserver defaults
And that should be it! Just restart, and you should be able to VNC straight in!
Wednesday, 15 August 2012
Raspbian Wheezy
So after I few weeks (months?) off I decided to try get back on top of everything and what better way than to try out the latest image? If you haven't been keeping up with things, you'll be pleased to know that Raspberry Pi now has it's own distribution (sort of) - Raspbian. This is a version of the Debian distribution that has been compiled specifically for the Raspberry Pi.
It can be found here on the Raspberry Pi downloads page:
http://downloads.raspberrypi.org/images/raspbian/2012-07-15-wheezy-raspbian/2012-07-15-wheezy-raspbian.zip
As always, you can write this using the standard DD process (see here for instructions).
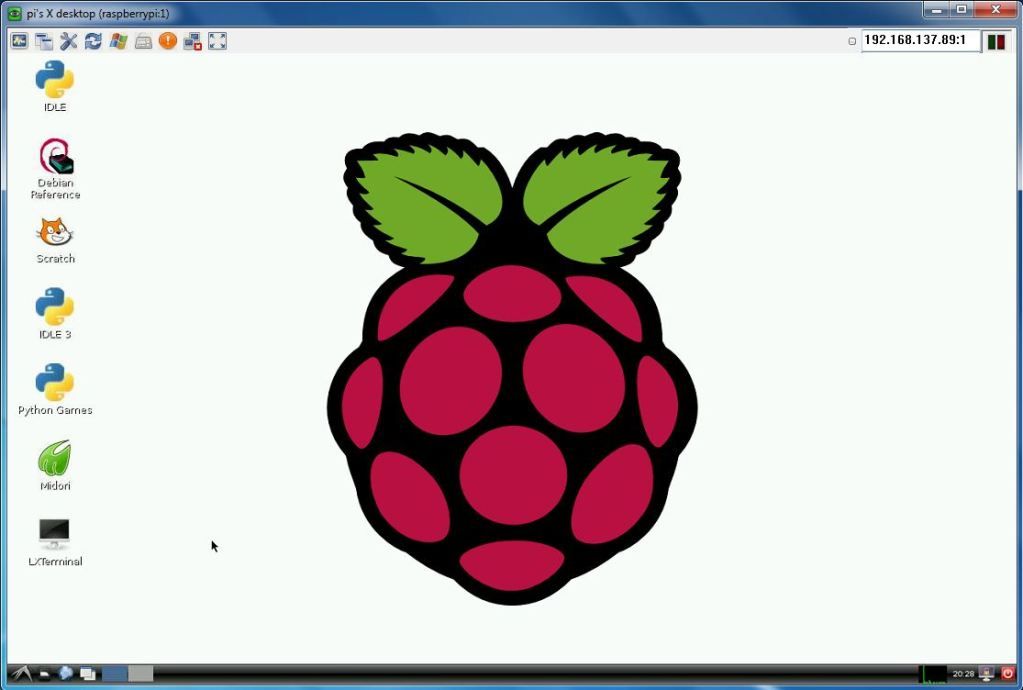
Right - now let's boot it up and see what it's like! I'm using VNC to connect remotely as my TV is occupied (by Game of Thrones, so I'll let it pass). You can find out how to set this up here, or just use your TV or HDMI-enabled monitor.
So - I've written my card now and here's what I have:

You'll notice that there's no ssh file here, but I tried booting it up and found that SSH was enabled, so no issue there (I need it to connect over SSH, download VNC and remote in).
And that's it - I'm booted up. Nothing looks too different:

although I did notice that performance seemed quite good. Issues I saw in earlier versions (massive CPU usage from Midori, etc.) were gone.
And I'm back baby!!!
It can be found here on the Raspberry Pi downloads page:
http://downloads.raspberrypi.org/images/raspbian/2012-07-15-wheezy-raspbian/2012-07-15-wheezy-raspbian.zip
As always, you can write this using the standard DD process (see here for instructions).
Right - now let's boot it up and see what it's like! I'm using VNC to connect remotely as my TV is occupied (by Game of Thrones, so I'll let it pass). You can find out how to set this up here, or just use your TV or HDMI-enabled monitor.
So - I've written my card now and here's what I have:
You'll notice that there's no ssh file here, but I tried booting it up and found that SSH was enabled, so no issue there (I need it to connect over SSH, download VNC and remote in).
And that's it - I'm booted up. Nothing looks too different:
although I did notice that performance seemed quite good. Issues I saw in earlier versions (massive CPU usage from Midori, etc.) were gone.
And I'm back baby!!!
Sunday, 24 June 2012
Media Centre - because we know we all want to...
Right - let's get back on track!
For anyone that's vaguely interested in this sort of thing, the fact that the Raspberry Pi has the potential to be used as a media centre has been once of the most talked about points. Now, for anyone paying closer attention to the project, you'll have read that there's a lot more this than plugging it in and getting a state-of-the-art media centre. This is still early days for the Raspberry Pi project (remember, we're still technically in the developer release stage) and the main focus is the educational release due out at the end of the year.
Thankfully, this is where the community comes in. There are a large number of people out there working on projects like this, and they're doing an awesome job!! The two main projects I've been looking at are OpenELEC and Raspbmc. Both of these are full media centre operating systems (they boot into an operating system that is a dedicated media centre rather than a standard desktop) running the XBMC interface, or XBox Media Centre. This is the interface that runs on the original XBox.
So - let's start with OpenELEC. This is a well-established solution that has been ported to the Raspberry Pi. It's still under development, but is feature-rich. As an open source project, the code it out there for anyone to download and compile, with a lot of published information on this. If you'd like to try build it yourself, take a look here:
http://elinux.org/RPi_building_and_installing_OpenELEC
Alternatively, you can get the latest build here (thanks sparky!):
http://sparky0815.de/
An for up-to-date builds, published by members of the community as they built it, take a look here:
http://www.raspberrypi.org/phpBB3/viewtopic.php?p=89072
http://www.raspberrypi.org/phpBB3/viewtopic.php?p=68324
And of course if you'd like more information on the project itself, take a look here:
http://openelec.tv/
Next, there's Raspbmc. From what I can make out this is a fairly new project, based on the Debian distro and XBMC, written specifically for the Raspberry Pi. While you have the obvious downsides to a new project like this (bugs, stability, etc.) there are a lot of positives - you have a product aimed specifically at the Raspberry Pi, without the distraction of different targets, distributions, etc. At first glance, the added benefit of Raspbmc is that is has an installer that automatically downloads the image and applies it to the SD card. I've always had issues with creating an SD card other than using DD for Windows (see here), this seems to write without a problem. So - here's where you can download the installer:
http://www.raspbmc.com/download/
And that's about all you'll need!
So - that's my first pass at a review (and first post in a few weeks!). I'll apply these images, test them out and post my feedback soon.
EDIT 24/11/2012: I've had a play with the latest 2 images and am pretty happy with what I've seen. I'll go into more detail soon, but for now you can find the images here:
Raspbmc - http://download.raspbmc.com/downloads/bin/filesystem/prebuilt/raspbmc-rc5-prebuilt.img.gz
OpenELEC - openelec.thestateofme.com (Thanks Chris Swan!!)
Tuesday, 29 May 2012
And out the other side!
So - after having my in-laws stay with us for close on 3 weeks, I finally get to play with my Pi again! Thanks for all your comments over the last few weeks - I have been reading them, but haven't had much free time.
For those of you not too focused on the Raspberry Pi site, there have been a few interesting developments. First off - how would you like to see the Raspberry Pi voted in as Innovation of the year? Vote now!
And here's another one - Google are quite interested in the work the Foundation is doing - so much so that they're investing in a bunch of boards, training a bunch of new teachers & sending them into schools - read more here!
So - what next for my Pi? I think I'll be tackling getting it properly hooked up to my network - either by getting a cheapie wireless USB dongle working, or finding a way to get it working through a 2nd wireless router. I'm thinking of using a spare Netgear router as an access point, routing onto my Linksys router upstairs. I've been digging around and found sites detailing how I can update the firmware to work in client mode. Not 100% working, but once I crack it I'll post it.
Monday, 7 May 2012
Browsing issues & other browsers
Now that I've had a chance to play around with my Raspberry Pi I've started looking at more mundane things like browsing. I've been using the browser the Pi ships with - Midori. While it sees OK, I've noticed several stability and performance issues.
The main issues I've found are as follows:
Some helpful advice from the forums led me to Chromium. This is an open-source version of Google's Chrome browser (As I understand it, Chromium is the open source code created by Google that produces their Chrome browser - other developers have taken than same code and created the Chromium browser).
I've installed it and it looks pretty good. Issue 2, 3 & 4 above are resolved, and although the CPU does still spike a lot moving between pages, it doesn't seem to affect general performance too much. Overall, I'd say definitely give it a go. This should provide you with everything you need to get it up and running.
The main issues I've found are as follows:
- When loading each page the CPU spikes to 100% for 3-4 seconds.
- When loading this blog the CPU spikes for a few seconds then then Midori crashes completely
- Gmail can only be used under the HTML mode
- While browsing the Raspberry Pi site & forum it seems OK, although when trying to reply to a post the CPU hits 100% and sticks there and keypresses are delayed by about 10 seconds. If I move out of the reply window the CPU drops and responses are OK, if I click in the window again CPU spikes
Some helpful advice from the forums led me to Chromium. This is an open-source version of Google's Chrome browser (As I understand it, Chromium is the open source code created by Google that produces their Chrome browser - other developers have taken than same code and created the Chromium browser).
I've installed it and it looks pretty good. Issue 2, 3 & 4 above are resolved, and although the CPU does still spike a lot moving between pages, it doesn't seem to affect general performance too much. Overall, I'd say definitely give it a go. This should provide you with everything you need to get it up and running.
Sunday, 29 April 2012
Quake 3!!
Thanks to a lot of people on the Raspberry Pi forums, I was able to get Quake 3 up and running with a fairly small amount of effort. As I don't own the game itself I'm simply playing the demo levels, but that's more than enough for now, as I've realised I'm particularly bad it would seem. I wasn't ever much of a gamer, but was addicted to Quake 1 & spent a fair amount of time on Quake 3, but it would appear the years have robbed me of the meagre skills that I spent days and weeks of my youth building up.
But, regardless of the number of times I've had to start a new game, it's still bloody cool. Playing it at 1080p on my 40" LCD looks beautiful!
As with the other tutorials I've created separated pages for them - hopefully this should give you everything you need to get Quake 3 up and running. As always, let me know how you get on, and if you hit anything I haven't covered.
Subscribe to:
Posts (Atom)